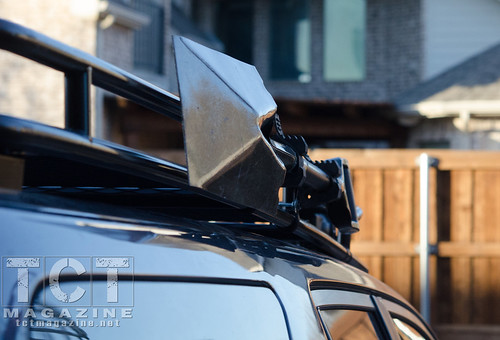
The idea is to use basic items from a hardware store to mount a pair of Quick Fist rubber tool holders to the rack. Besides a pair of Quick Fist holders, here is what’s needed from the hardware store:
• 4 stainless steel cable clamps with rubber housing
• 1 metal strip about 1-inch wide and 8 to 10-inches long (e.g. a strip of aluminum)
• 4 stainless steel 1-inch bolts that will fit through the cable clamp holes, 4 nuts, and 6 washers
Tools needed:
Drill and a bit that fits through the cable clamp holes
• Screw driver
• Wrench or socket for the nut
• Snips for cutting the metal strip
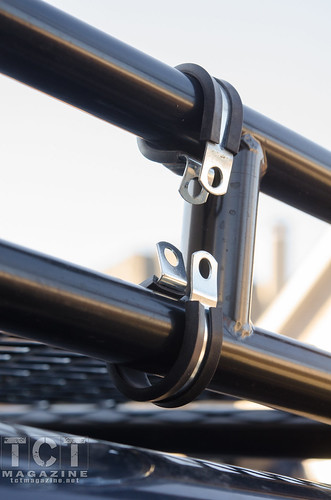
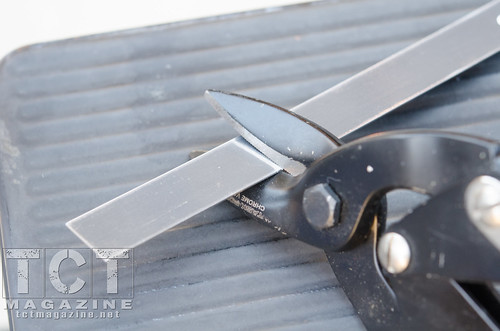
After assessing where the shovel will rest, attach the cable clamps to the tubing as seen in Figure 1. Hold the metal strip up, as seen in Figure 2, to determine how much of the strip will be used. Snip the metal at the desire length (Figure 3). Now determine where the holes need to be drilled to align with the holes in the clamps. After drilling, you are ready for the install.
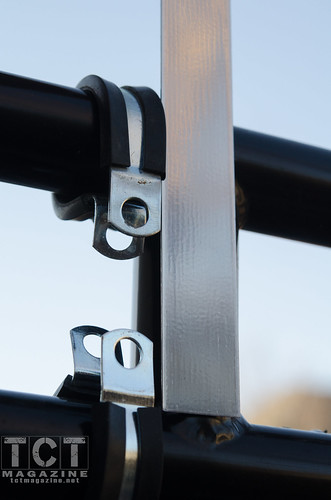
Place the Quick Fist screw hole next to the upper cable clamp hole, while inserting the metal strip between the clamp and the Quick Fist. Insert screw and tighten down the nut. Add the next screw to the bottom clamp and hole in the metal strip. Result should resemble what’s seen in Figure 4.
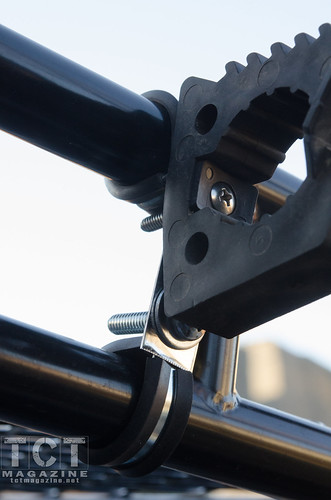
The shovel should rest securely and high enough as to not damage the vehicle (Figures 5 and 6). Why not just use cable clamps on the upper rack tube only? While the rubber grip on the rail can be tight, off-roading will cause the weight of the shovel or axe to rotate the clamps to a position that will cause the tool to rest a blade on the roof. Attaching the bottom cable clamps and strips of metal are what prevent the top clamps from rotating.


