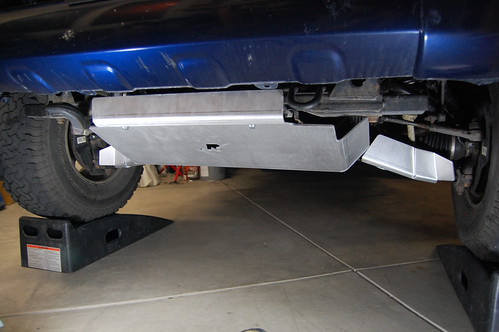
The directions were straight forward and easy to follow.
Step one: remove the factory skids.
Step two: retap some of the holes
Step three: set the floor jack and skid into place
Step four: install the bolts and washers
Step five: tighten
Additional steps to install lower control arm skids:
Step one: hold the plate in place
Step two: affix the bolt assemblies
Step three: tighten
Done (the last step includes drinking a beer, but that’s optional for some)
With all of the mounting hardware included, bolt holes being preset, and using a floor jack to hold the skid up and in place made the install fairly easy.
The lighter weight aluminum was much easier to work with than heavy steel.
Using a floor jack (or a helper) to hold the skid up made starting the bolts so easy . . .
(photo3)
The LCA Skids were so easy to install I couldn’t believe it. Three bolts and done . . .
(photo4)
So far we have done some serious testing. Bangin rocks just about every weekend and all I have found so far are a few scratches. And these scratches are only superficial.
If there is a fault that I could have found to this point there is only one. The bolt holes on the front part of the skid could be just a little more forgiving. We did need a pry bar to force the plate over ¼” and a drill to widen the hole just a touch so we could start the last bolt. Otherwise this had to be the easiest install I have ever done.
As far as the look, you tell us . . .
(Photo5)
I think they look great and I know they are working great!
Down the road I plan on continuing the underbody protection with skids to protect the rear diff, the transfer case, and the fuel tank.
More Photos!
[flickr set=72157631752865074]
Remember, tell your friends! They can subscribe for FREE using this link!

 I was looking for a heavy duty, better looking, and lighter weight solution in skid plates and Ricochet has what I was looking for! A heavy duty one piece front skid (bash plate and engine skid plate combined) made from ¼” 5052-h32 aluminum along with the control arm guards made from 3/16” aluminum is what we went with.


