Summer 2016
- Details
- By Roger Huff
I recently installed a set of Bushwacker fender flares onmy2013 Toyota FJ Cruiser. It was a change from the naked look I was previously rocking—byI, I mean myFJof course. In other words, I had removed the stock fenders a while back, and now I’ve gone from no fenders to these Bushwacker ones. The addition gives the cruiser a beefier look, while also making it look somehow more polished. It looks great! Here are the basic steps I went through to install them.
Opening the Package
I received the box for the kit—a very, VERY big box—and opened itupto check out the parts. I laid them all out and read over the manual, which describes all of the components that should be included and walks through the installation process step-by-step. Everything looked like it should, so I got to work.
Preparing the Area
First, I needed to clean and prep the areas of the FJ where the Bushwackers would be going. I happened to have a sticker on that area on one side, so I had to carefully remove it with a razor blade. Then, I cleaned off as much of the dirt and grime as I could from the area around the wheel wells. MyFJ goes ona lot of adventures, so there was a lot of dirt. I used a wax-type cleaner todo the job. Next, I needed to make a minor modification to the lower body molding on the cruiser. There is a part of the plastic trim that extends slightly into the wheel well, which would bein the way of the new fenders. I simply cut that piece off in a smooth line down, following the shape of the wheel well. Lastly, I removed the bolts from the inside of the wheel well to make room for the new bolts I would be using as part of the installation—all of which is described in detail in the manual, of course.
Prepping the Fenders
There were only a few simple steps required to prepare the fender flares. First, I puton the included trim liner, a thin strip of rubbery material that forms a transitional seam from the fender to the truck body. It sticks right on the fenders, not on the truck. I was careful to run the liner smoothly along the edge of the fender and around all the curves, so that it stuck well. Next, I puton the decorative nuts and bolts that line the fender for that tough-looking style.
Installation
The next step was to put the fenders on the FJ and bolt them on from underneath. One of the fasteners included in the kit is a specialty pin-type fastener rather than a bolt, and it goes in a specific hole; again, all is explained well in the manual. I started with the front wheels, and had an easy time with it; it was assimple as setting the fender in place, fastening it on, and repeating on the other side. Then I moved onto the back fenders, which took more effort and most of the time to install. For the back wheels, the fender flares come in two pieces which need tobe bolted together. I also had to make a modification to the fenders on the back, because I have an Expedition One Trail bumper installed and they couldn’t fit with it without modification. After determining where to cut, I put the Dremel tool to work and carefully carved some of the edge off in a square shape to frame the bumper, until the fit was just right. Then I went to work on the smaller piece which goes on the end of the fender at the bottom of the arc. I modified itin a similar way, carving out a rectangular section to make room for my bumper. I repeated the modifications on the rear fenders for the other side as well. After that, I bolted the pieces together and finally, installed them on both sides.
The Finished Look
From start to finish, this entire project took me about 5 hours. A significant chunk of that time was likely because ofmy bumper which required extra work to make the Bushwackers fit. After all was said and done, I’m definitely satisfied with the results. They look good and add something extra to the overall appearance ofmy cruiser. I would recommend these fender flares for their (general) ease and simplicity of installation, and for the way they complement the FJ’s look so well.
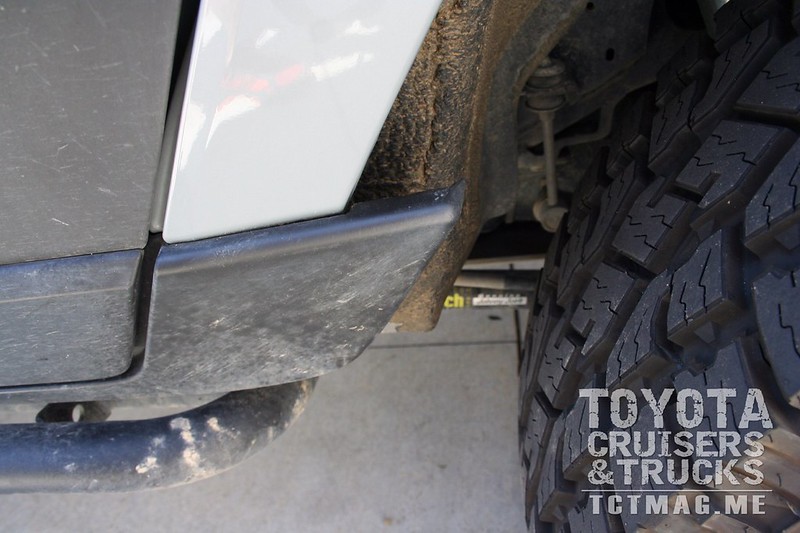
Body molding before modification
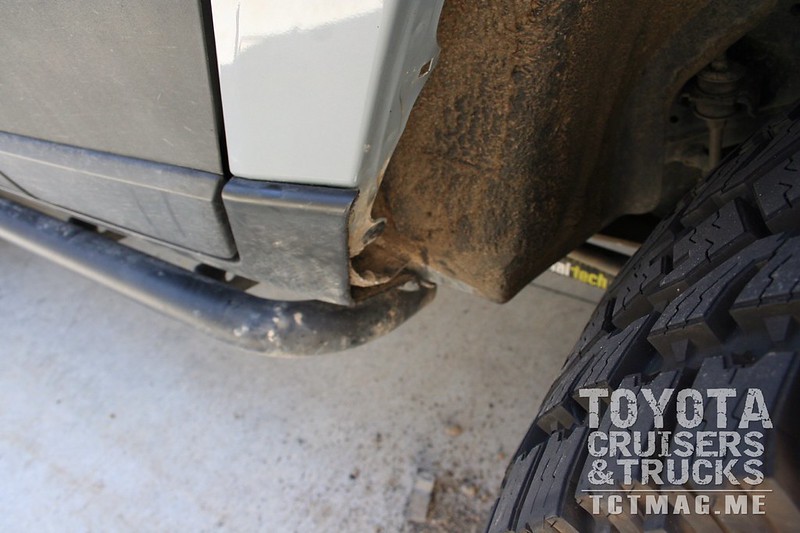
Body molding after modification
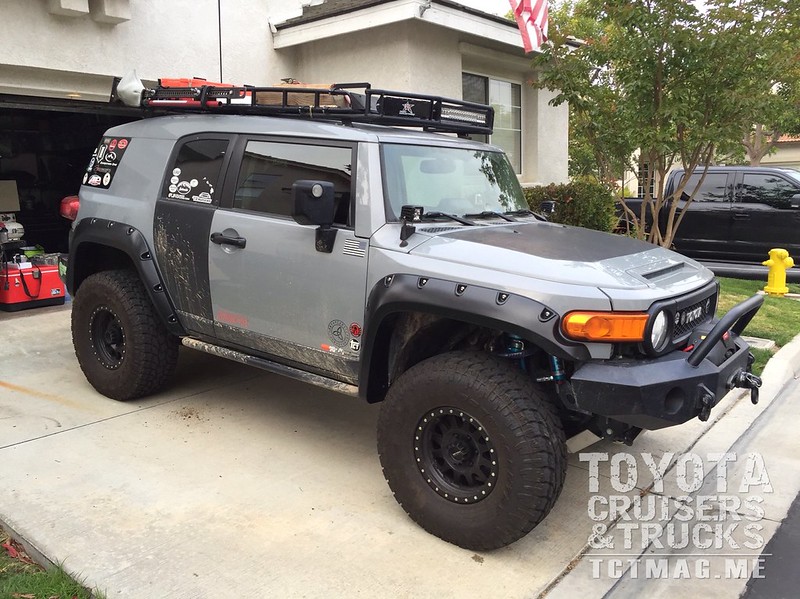
The finished look
More Photos!
[flickr set=72157672907954153]
To get your copy of theSummer 2016 Issue: |
- Details
- By Todd Gatewood
They came from all parts of the country; each sharing a common love affair with adventure, family, and camaraderie that many believe only a Toyota 4x4 can evoke.
From Coast-to-Coast, Texas, to the Northern Border they came. It had never been done in all of the Americas. What started as an informal gathering of a few likeminded Land Cruiser owners in 2015, evolved this year to an unprecedented gathering of over twenty 200 Series Land Cruiser owners in the famous western playgrounds of Moab, Utah and Ouray, Colorado.
Twenty does not sound like a large number, but sightings of late model Land Cruisers are about as rare as seeing a news Rolls-Royce. (Rolls-Royce and Toyota Land Cruiser sales in the US were roughly the same last year). Could it be the stories, the pictures, or perhaps the banter from 2015 that led to this historic gathering? Or was it the fast growing wanderlust seed planted when many purchase their first Land Cruiser, or when watching an episode of an Overland series on YouTube? What drove a gathering of nearly 2 million dollars’ worth of metal to congregate at one place?
Cody Golliher, who resides with his family in Fort Collins, CO, is the organizer of the 200 Series gathering. “I attended FJ Summit several times in the very beginning and it was so much fun to see so many people who shared my same interest and passion,” said Golliher. “It ended up growing so big that it filled up quickly and I was unable to attend. I really wanted to keep going to Ouray with other enthusiasts so I decided to see if there was any interest in other 200 Series Land Cruiser owners who would like to go, and the rest is history.”
Travis Wilcox proposed a great idea to the group: “It’s only 3 hours from Ouray- Let’s also do Moab as a Pre-Run.” And so it was on! The early adventurers arrived in Moab a few days ahead of the larger gathering that would soon convene all arrive in Ouray. This group of six set their sights on the legendary slick rock and rugged trails near Moab. Hells Revenge, Fins & Things, and Top of the World trails gave little resistance to the fully equipped 200 Series Land Cruisers while offering amazing views and memories over tightly gripped steering wheels and taunt seatbelts. It was a textbook demonstration of the rugged and refined capabilities and features of the latest version of Toyota’s flagship vehicle.
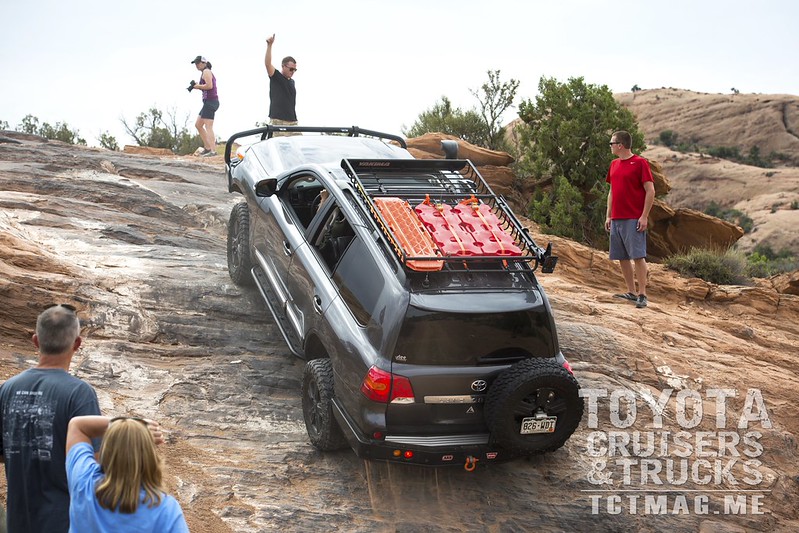
Photo by Ken Reiten
The gods of Moab sought to disrupt the plans to make it to the summit of the Top of the World Trail -throwing lightning bolts, rain, and obstacles that had some questioning the destination. Were the imaginary gods on the side of those who believed the 200 Series Land Cruiser was an $85,000+ mall mobile? The people on this adventure knew better. With only a ½ mile and 500 feet elevation to reach the infamous ledge rock at the summit, the group put safety first and spread out until there was a break in the lightning storm.
Once all was safe and we traversed the rest of the way, the rewards at the summit were majestic views that only the combination of the wet landscape, fog, and the sunlight that illuminated them could have provided. Greg Weik’s Phantom 4 drone was launched, and epic pictures and videos ensued. The next morning, the group set out on a three-hour drive that would put this group in Ouray just as others began arriving from all parts of the country in anticipation of the historic gathering.
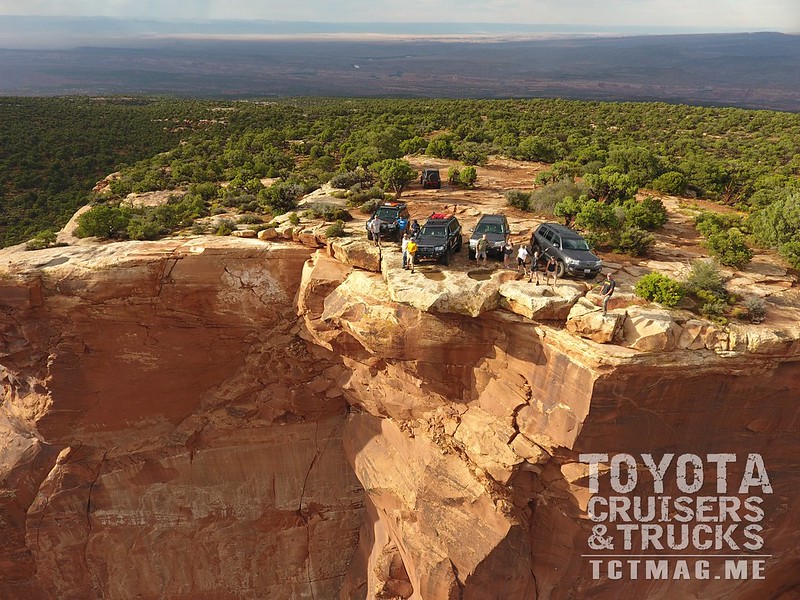
Photo by Greg Weik
It was the afternoon of August 4th in a small park near a picturesque Gazebo in Ouray when history was made. Twenty-one 200 Series Land Cruisers, ranging in years from 2008 to 2016, had gathered in the small town known to be a basecamp for large 4x4 events such as FJ Summit. More than 60 souls convenedmet to get to know each other, share food and drink, share our rig upgrades, and watch our kids blow bubbles and play. “I envisioned a gathering that was intimate where friends were made and families could play. We all have a love for Land Cruisers but I wanted more than just wheeling and a corporate style event,” said Golliher. The gathering was exactly that.
The next three days provided breathtaking trails across the San Juan Mountains including Engineer Pass, Poughkeepsie Gulch, Imogene Pass, and the formidable and feared Black Bear Pass-in the rain. For some, it would be the first true test of their stock or modified Land Cruiser. Yes, these are also cushy rides with heated leather seats, 18-speaker sound system and a built-in refrigerated cooler in the console. Don’t let that fool you. The observed smiles said it all—the kind of smile you see when your daughter kicks her first soccer goal or you son puts a ball through the hoop for the first time. in his first basket. These Toyotas really are Legendary. They really do defy logic and physics to overcome the obstacles ahead with unsurpassed reliability and safety.

Photo by Greg Weik
In the lower valley in Ouray, a highlight of the event was the Slee Off-road Road-sponsored group gathering for drinks and dinner. Friendships were forged and social media connections were made. The kids spoke of the Pokémon they caught and, with equal excitement, the elk they saw earlier in the day.
Golliher has pondered the future for the group. “I really like the idea of destination places each year. I love Ouray but there are so many other great places to visit,” he said. “It's not just off-roading but seeing new places with your friends and family. It will get more challenging as we grow but we'll adjust as it happens. I do not envision this ever becoming a big sponsored event, but one that stays true to people and enjoying great company.”
On the last day, the skies sky’s cleared to reveal the true beauty of this area. The blue sky, clean mountain air, the small stream crossings, and the majestic mountain views clearly demonstrated why this area is called the “Switzerland of the U.S.A.”. That evening, the group all gathered once more to break bread, enjoy a home grown brew, and share stories of the day. Goodbyes, handshakes, and hugs were abundant, - but so was the talk at every table….of next year.
If you have a 200 series Land Cruiser (2008-2017) and would like to join the adventure, be on the lookout for postings for the next adventure slated for 2017 on the 200 series IH8MUD forum. Special thanks to photographers for their submissions. See more of Ken Reiten’s work at reiten.smugmug.com and Matt Frederick’s work at themirrorpool.smugmug.com.
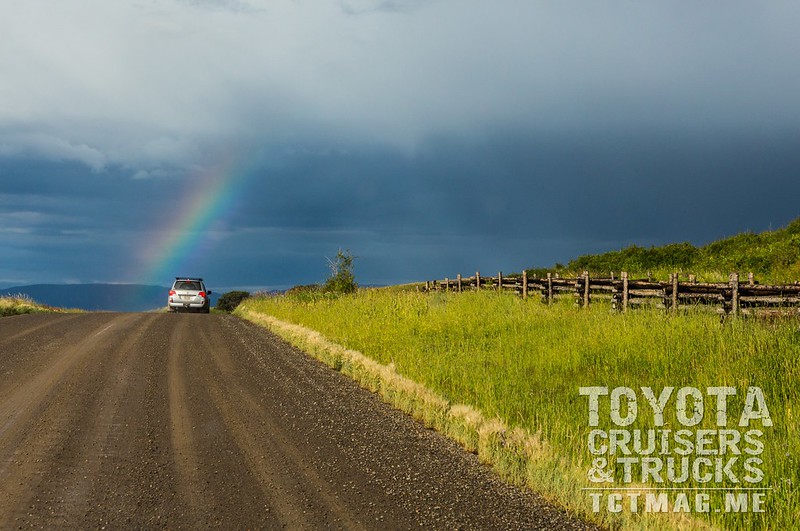
Photo by Matt Frederick
More Photos!
[flickr set=72157675356871331]
To get your copy of theSummer 2016 Issue: |
- Details
- By Phillip Jones
Feeding off the success of the previous year, the annual Lone Star Toyota Jamboree hit another homerun with over 500 people in attendance. A total of 320 Toyota Trucks and 46 sponsors made for a spectacular event at Barnwell Mountain Recreation Area OHV Park, including “a raffle surpassing $50,000 in value” according to organizer Chris Gray.
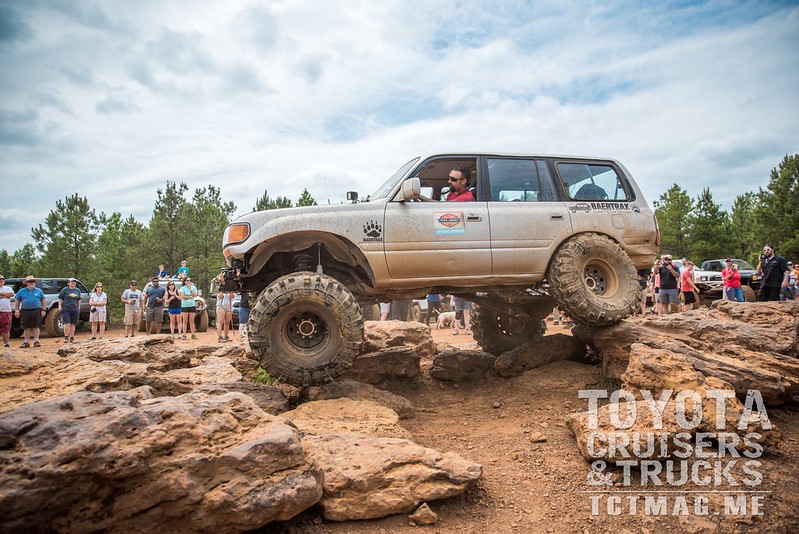
1)Blind Man’s Bluff where driver is blindfolded and completely dependent on the passenger serving as the co-pilot.
2)Rock Garden Crawl where distance accomplished determines the winner for each tire size classification.
3)The return of the Timed Obstacle Course where going airborne can be to the driver’s advantage.
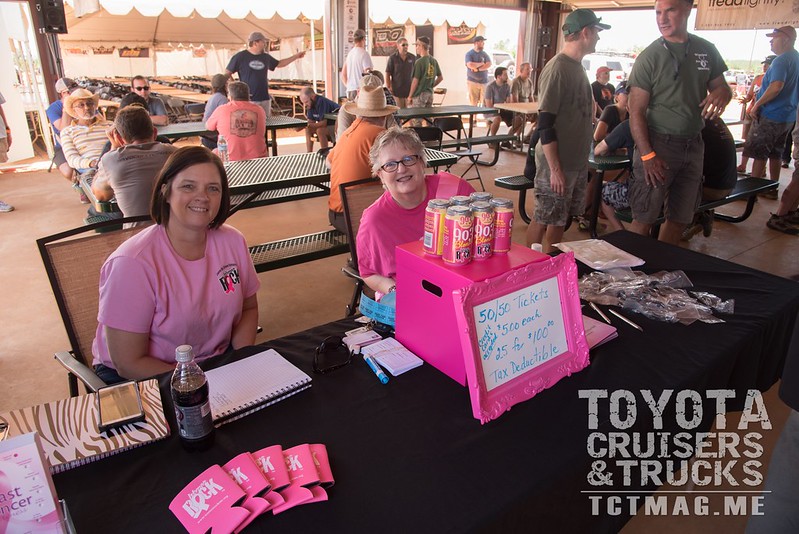
It was a very emotional time for longtime Jamboree organizers after learning a long time Toyota Trail Riders club member and Jambo attendee, Angie R., was having a rough time in her fight with cancer. The Jambo staff had already chosen breast cancer combatant organization called Women Rock, Inc. as the recipient of charity contributions, and had raised $7888 for their efforts. Upon hearing an update during the raffle from friend, Butch Baker, of Angie's fight, the Toyota crowd came together and raised an additional $3000, including a $1000 donation straight from Jamboree itself, togo directly to the Rushing family! Several raffle winners even donated their items back to be auctioned off for money to be donated. It was heart moving and emotional time to see this outpouring of support. In total, Women Rock raised $10,958 at the 11th Annual Lone Star Toyota Jamboree!
The dates for Jamboree next year are May 4-7, 2017. If you have not yet visited the giant BMRA off-road park in the eastern Piney Woods of Texas, shoot for next year by attending Lone Star Toyota jabmoree. You don’t want to miss this great event.
More Photos!
[flickr set=72157672907766233]
To get your copy of theSummer 2016 Issue: |
- Details
- By Rob Anderson
The more time we spend with our four-legged travel partners in the outdoors, the more we exposure them to injury. Even a minor pet injury can ruin an adventure and there is nothing worse than seeing your pet limp in pain. I have had to deal with burrs, impaled object, large lacerations, and both heat exposure and borderline hypothermia in my dogs. Even though there are plenty of kits you can buy on-line, I believe in putting your own kit together, simply then you know what is in it. I also think when conditions allow, keep the kit on your dog. This way the kit is within reach of the pup at all times. Second, if for any reason you and your dog are separated, there is a kit handy for the person on hand working with your pup’s injuries.
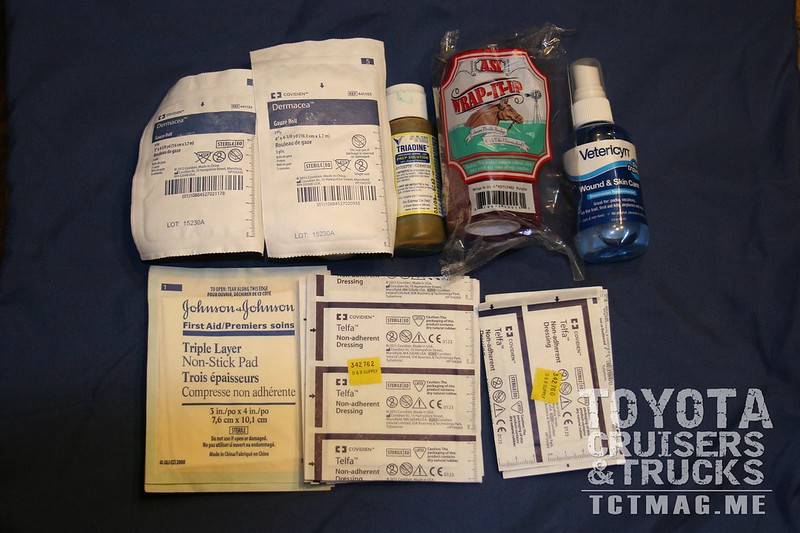
We have a main kit for the house, one in the rig, and then a small field kit that goes a doggie daypack with smaller quantities that are re-packed and well labeled. I will only list out only the items that goes in our kit that the pups pack with them. We have larger pups, so if your adventure pup is a small breed, well you get to hike with the kit. In other words, no K9 EMT kits on your Mini-Rat Terrier. I will cover what to carry for your pup in your rig later. Something to keep in mind, if out adventuring in hooter temps, then your pup is going to overheat, even if hanging out in your rig.
We highly recommend that you seek out classes that are specific to first-aid for dogs. Get a good solid field manual to keep with the kit. Finally, dogs are different from us two-legged- human medicine unless noted is not for puppy consumption.
BIG DISCLAIMER— THIS IS MY LIST YOU ARE RESPONSIBLE FOR CONSULTING YOUR OWN VET. WE DO NOT ACCEPT ANY RESPONSIBLITY FOR YOUR ACTIONS OR ACTIONS TAKEN ON BEHALF OF THIS LIST
•K9 EMT Gel- This stuff interacts with the wound and maintains much-needed moisture that helps a wound in healing. In addition, it acts as a tissue adhesive to help prevent bacterial infection. It also reduces bleeding and pain. Keep it current though, it will expire.
•Tweezers- When your pup is hurt and you are trying to remove a sliver, they don’t always hold still. One poke with sharp or pointed objects and your pal will not likely lay still for you again. I use flat slant tipped tweezers.
•Scissors- I carry both small dull-ended snips and EMT shears. The small snips are excellent for trimming out goat heads in the fur areas in the paws or burrs on the belly. EMT shears are good for cutting medical tape.
•Tick Removal Tool. These are designed to remove nasty ticks, which, if left in, can lead to infection or worse, diseases like Rocky Mountain Spotted Fever or Lyme’s.
•Cotton balls
•4×4 Gauze Pads and 4” Rolled Gauze. •Hibitane Disinfectant- Learn to use BEFORE you use it
•Saline solution. We live in a sandy area and this is great to get dust and sand out of the eyes. Can also be used to clean wounds. DO NOT USE Contact solution.
•Flush Syringe
•Benadryl- Trigger bit a wasp one day- and I was pretty worried that he was going to swell up and not breathe. A fellow vet-tech of Melissa’s gave him a Benadryl. It reduced the swelling, keeping his airway open...and put him to sleep. Antihistamines can be used to calm itchiness, swelling, and hives caused by insects, but, as with any medication, please with your vet for dosage.
•Antibacterial Wipes or skin soap.
•Bag Balm/Skin & Paw Cream – When feet get torn up. Keep it in a labeled zip-tight bag.
•Rectal Thermometer. A dog’s average is around 101°F.
•Petroleum Jelly. For use with the thermometer...and be sure to scratch your pup’s ears after the intrusion....
•Emergency numbers- I keep three sets of numbers in my kit. My regular vet, the 24-hour vet, ad then when traveling, numbers of vets at each destination.
•Latex gloves
•Emergency contact numbers. The digits for your vet, the closest animal emergency hospital, and the poison control hotline.
•Triangle Bandage to use as a muzzle
•Corn- starch- To stop bleeding of nails (not wounds) that have been broken or cut to the quick.
•Vet Wrap
•Small Space-Blanket (Compact Size)
First Aid Manual for Dogs (small pocket-sized)
More Photos!
[flickr set=72157676909572255]
To get your copy of theSummer 2016 Issue: |


